
Terracotta Sealer Peeling, Hazy or Patchy? How to Strip and Reseal Tiles
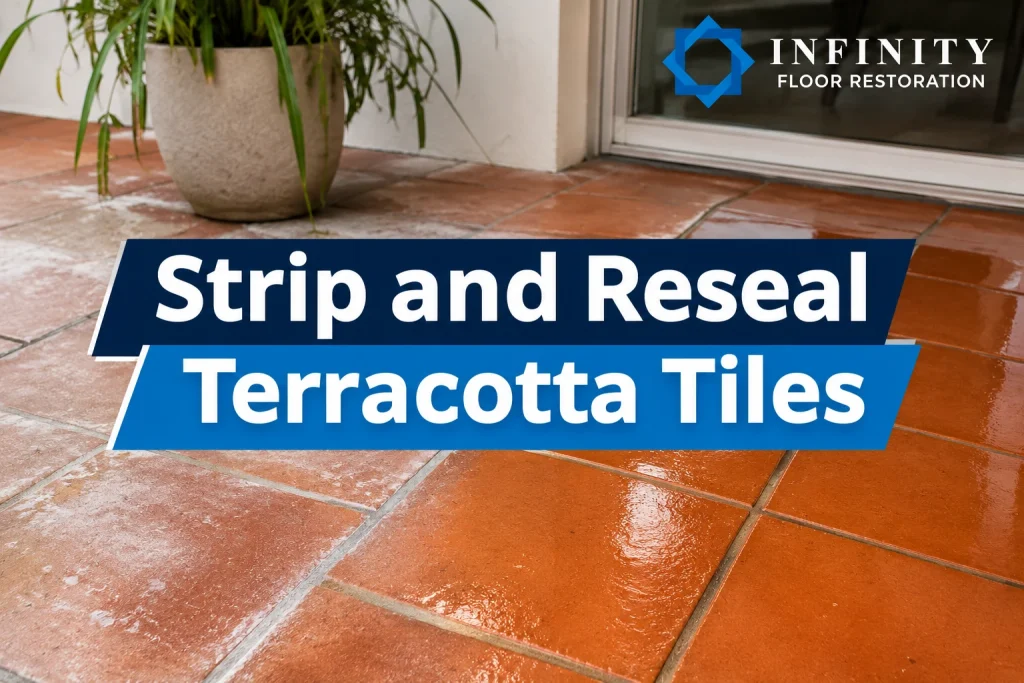
If your terracotta sealer is peeling, cloudy or patchy, another coat won’t fix it. The failed sealer usually has to come off, the tiles must dry completely, and then a suitable new sealer goes on. This guide explains how to strip and reseal terracotta tiles, starting with how to work out what went wrong.
Order matters because terracotta is porous clay that soaks up water and dissolved salts. If you seal over damp tiles or leftover salts, terracotta white haze often comes straight back.
Please note: This is general guidance, and stripping methods vary between products.
What does a failed terracotta sealer look like?
Signs of failure include terracotta sealer peeling, white haze, milky patches, uneven shine and a sticky surface. Each one points to a different cause, so match what you see before buying anything.
What you see | Likely cause | Sensible first step |
Dry white powder that brushes off | Efflorescence (salts carried up by water) | Dry-brush it and find the water source |
Milky or white patches in the sealer | Moisture trapped under a topical sealer | Let it dry, then test before stripping |
Peeling or flaking | The sealer has lost its grip | Strip the failed coating completely |
Patchy shine | Worn walkways or uneven coats | Check which sealer type you have |
Sticky or tacky surface | Not cured, too thick or reacting with residue | Check the label’s curing guidance |
Haze returns after resealing | Tiles sealed while damp, or salts trapped | Strip, find the moisture, dry fully |
Orange or brown marks outdoors | Iron from bore water | Check sprinklers and get advice before treating |
Is it sealer haze or terracotta efflorescence?
Terracotta efflorescence is a dry salt powder that sits on the surface and brushes off, while sealer haze sits inside the sealer and won’t brush away. Efflorescence forms when water moves through the tile, grout or slab, dissolves natural salts and leaves them behind as it evaporates.
Try this test on a dry day:
- Rub the white area firmly with a dry, dark cloth. White powder on the cloth points to salts.
- If nothing comes off, gently scratch a hidden corner with a plastic scraper. A cloudy film that scratches or flakes points to sealer.
- Watch the weather. Haze that looks worse after rain and better in dry spells usually means moisture is involved.
Sometimes it’s both. Salts trapped under a sealer look just like sealer haze, and stripping alone won’t stop them while water keeps moving through the floor.
What type of sealer is on your terracotta?
Most terracotta floors have one of three finishes: a penetrating sealer, a topical sealer, or an older wax or oil finish. Knowing which one you have tells you how to remove sealer from terracotta, or whether it can be stripped at all.
- Penetrating sealers (also called impregnating sealers) soak into the clay. Tiles look natural with little shine, but water beads on top.
- Topical sealers form a visible film. They often look satin or glossy and can peel, scratch or turn milky.
- Wax and oil finishes feel slightly soft or greasy, smear when scratched and can whiten where water sits.
Strippers are made for topical coatings and wax. Penetrating sealers sit inside the clay and usually wear away rather than strip off.
How do you strip and reseal terracotta tiles safely?
To strip and reseal terracotta tiles safely, remove the old coating with a stripper made for that sealer type, rinse away every trace, and let the tiles dry fully. Only then should you apply the new sealer.
Step by step: removing the old coating
- Choose a stripper the manufacturer says suits both your sealer and terracotta.
- Read the label and safety data sheet. Safe Work Australia’s guide to safety data sheets explains what each section means.
- Test a small hidden patch to check the stripper works and doesn’t mark the tile.
- Protect skirting boards, walls, drains and garden beds, and open doors and windows.
- Work in small sections and keep the stripper wet. If it dries out, softened sealer can bond back to the tile.
- Scrub, then lift the slurry (the sludge of stripper and old coating) with a squeegee and wet vacuum. Grout lines trap old sealer and grime, so give them extra attention or book deep tile and grout cleaning.
- Rinse thoroughly, and neutralise only if the label tells you to.
- Check the coating is gone. The surface should have no shine, film or sticky patches. If water still beads, follow the penetrating sealer’s own instructions rather than stripping again.
Safety warnings before you start
Never mix strippers or cleaners, and don’t use acetone or any solvent the label doesn’t recommend. Floors are very slippery while stripper is on them, so wear grippy shoes, gloves and eye protection. Keep slurry out of stormwater drains, pools and gardens. For businesses, WA’s Unauthorised Discharges Regulations make it an offence to let certain materials enter the environment.
Why must terracotta be completely dry before you reseal?
Terracotta must be completely dry before resealing because moisture trapped under new sealer causes much of the haze and peeling you’re trying to fix. After stripping and rinsing, the clay holds a lot of water and often stays damp longer than it looks.
How to check the tiles are dry
Drying time depends on the product, weather and floor, so follow the sealer label. These checks help:
- Look at the colour. Damp terracotta looks darker, so wait until the colour is even everywhere, including edges and grout lines.
- Try a plastic sheet test. Tape a square of clear plastic flat on the tiles and check it the next day. A mist underneath or a darker patch suggests moisture is still escaping. Treat this as a guide, not a guarantee.
- Keep air moving. Don’t cover the floor with rugs, drop sheets or furniture, because they trap moisture.
The Bureau of Meteorology describes Perth’s winters as cool to mild and wet, which slows drying, especially on slabs. If damp patches keep returning in the same spots, water may be rising through the slab or coming from a leak. Fix that first, or the new sealer will fail the same way.
How do you choose the right reseal for terracotta?
Choose a sealer that suits where the tiles are, the look you want and how much moisture the floor deals with. Where moisture is a concern, a breathable sealer that lets water vapour escape is usually safer.
- Natural look: a penetrating sealer that keeps the clay’s original colour.
- Richer colour: a colour-enhancing sealer that deepens the tone.
- Sheen: a topical satin or gloss coating, which sits on top and wears first in walkways.
Outside, use only products labelled for outdoor use on terracotta or clay. Indoor sealers aren’t made for strong sun and rain.
What makes outdoor terracotta in Perth different?
Outdoor terracotta in Perth faces strong sun, winter rain, pool splash and, at many homes, bore water from reticulation. All of these put extra strain on the sealer.
Healthy WA notes that bore water can cause staining because it carries dissolved salts and metals. In some Perth areas, iron leaves red-brown marks on paths. Angle sprinklers away from paved areas, and check the Perth groundwater map for your area’s iron staining risk.
Pool surrounds stay wet for long periods, and a glossy topical finish can be slippery when wet. Ask whether the anti-slip floor treatment Infinity Floor Restoration offers for wet tiled areas suits your terracotta.
When should you leave failed sealer to a professional?
Leave it to a professional when you can’t identify the old sealer, when the problem has returned after an earlier reseal, or when the area is large or close to pools, drains or gardens. A test patch that didn’t lift the sealer, or that changed the tile’s colour, is another sign to stop.
Infinity Floor Restoration provides terracotta cleaning and sealing in Perth, and its technicians inspect the floor on site before anything is stripped.
Why does keeping a sealer record help next time?
A sealer record helps because the next person working on your floor, whether that’s you or a technician, can choose the right remover the first time instead of testing several strippers on your tiles. It also helps you avoid putting an incompatible product over the old one.
What to write down
- The product name and type, such as penetrating, colour-enhancing or topical
- The finish you chose and how many coats went on
- The date and the rooms or outdoor areas you sealed
- Anything unusual, such as a patch that stayed darker or took longer to dry
Where to keep it
Photograph the label and save the photo with your home documents, along with the safety data sheet. If a contractor seals the floor, ask them for these details before they leave. A record also helps future owners if you sell, because they won’t inherit the same guessing game.
Restore your terracotta floor with Infinity Floor Restoration
At Infinity Floor Restoration, we believe a failed sealer deserves a proper diagnosis before anyone reaches for a stripper. The easiest way to start is to tell us what you’re seeing.
Call 08 9468 0798 or email en*****@******************om.au to talk through the problem and where the tiles are.
From there, our BICS-trained technicians can visit for a free on-site assessment and explain what’s causing the problem. Prefer to leave it to us? We’re a family-owned business that has been WA-owned and operated since 2005, working from Unit 5, 249 Balcatta Road, Balcatta.
Whether it’s a hazy kitchen floor, a peeling courtyard or tiles around the pool, explore our floor restoration and cleaning services and let’s get your terracotta looking right again.
Book Your Free Site Assessment
Frequently asked questions
Should I strip the whole floor or just the bad patch?
Usually the whole area, or at least up to a natural break such as a doorway. Patch repairs can leave visible edges, because old and new finishes rarely wear or reflect light the same way.
Will stripping change the colour of my terracotta?
Bare terracotta often looks lighter and flatter, especially if the old sealer was glossy or colour-enhancing. The tone usually deepens again once it’s resealed.
Can I use a pressure washer on terracotta?
Be careful. High pressure can damage softer or handmade terracotta and wash out grout. It also forces more water into the clay, which can mean a longer wait before resealing.
Is efflorescence harmful to terracotta tiles?
Light efflorescence is mostly cosmetic. Over time, though, salt crystals forming inside porous clay can wear the surface, so it’s worth stopping the water that carries them.